

 New Code Sent!

How to use a gas stove: confident gas stove cooking
Whether using a new gas range or cooking with gas for the first time, there is a satisfying rhythm to it that comes quickly once you know the basics. Gas provides instant heat, a visible adjustable flame, and responsive control for any meal. This guide for gas ranges, cooktops, and rangetops covers everything from lighting burners to getting the most from your gas oven.

Sign Up for More Insights to Stay Connected
Enjoy articles like this? Get helpful guides and appliance care tips sent straight to your inbox.

Your subscription was successful
Thank you for signing up. Keep an eye on your inbox for our next newsletter.


Setting Up Your Kitchen for Gas Cooking
Before lighting a burner, ensure your cooking area is clear from clutter. Remove unnecessary items from the stovetop, keep flammable materials like dish towels and paper away from the burners, secure loose clothing and hair, and turn pot handles inward. Next, check that burner grates and caps are properly seated, and turn on your range hood or open a window for ventilation. Never leave a high-heat burner unattended, as gas responds instantly and can boil over or burn a delicate fish filet faster than you might expect. For hood height guidance, see the guide on range hood height above a stove.
Before You Cook Checklist:
Review this quick checklist of things you should do before starting to cook on your gas stovetop:
Stovetop surface is clear of any items
Burner grates are properly seated
Range hood is on (or a window is open)
Pot and pan handles are turned inward
Loose clothing and hair are secured

How do gas stovetop burners work?
A gas stove works by delivering a controlled flow of gas to each burner, mixing it with air, and igniting it to produce an open flame that heats your cookware directly. On most modern gas ranges, an electronic ignition system creates a spark when you push and turn the control knob.
When you push in the control knob and turn it to the LITE position, the electric spark igniter fires. You will hear a clicking sound — that is the igniter working. Once the burner catches a flame, you turn the knob to your desired heat setting between High and Low. When all burners click at once after you turn one knob, that is completely normal — it is simply how the ignition system operates on some models. Older models may use a standing pilot light that remains lit continuously instead of an electronic spark; your owner's manual may specify which system your model uses. For a more detailed look, check out this guide to how a gas stove works, including the oven.
Understanding Gas Stove BTUs
The heat output of each burner is measured in BTUs — British Thermal Units. The higher the BTU rating, the more heat it produces. A high-BTU power burner brings a large pot to a rolling boil fast; a low-BTU simmer burner delivers the gentle heat needed to melt chocolate without scorching it. On select Whirlpool® gas ranges, a 5,000 BTU burner handles low-heat simmering, while the SpeedHeat™ Burner boils 20% faster1 with high heat, so you can get dinner on the table quickly.
1. Compared to 9.5K burner on the same model.

How to Light a Gas Stove: Step-by-Step
Lighting a gas stove is a simple, confident process once you know the sequence. Push in the control knob, turn it to LITE, wait for the flame to catch, then set your heat level by adjusting the knob. The steps below walk you through the full process from stovetop prep to shutting the burner off — including how to light your stove manually when the power is out. Note that the exact steps may vary by model, always read the owner’s manual for your model.
Step 1 — Clear the Area and Turn On Ventilation
Remove anything from the stovetop that should not be there while cooking. Confirm all burner grates are properly seated and that the burner caps are in place on each burner base. Turn on your range hood or open a window before lighting the first burner.
Step 2 — Choose the Right Burner for the Job
Matching the burner to the task makes a noticeable difference. Gas ranges and cooktops feature burners at different BTU levels to give you flexibility for everything on your menu:
| Burner Type | Best Used For | BTU Range |
|---|---|---|
| Simmer Burner | Warming leftovers, melting chocolate, keeping sauces at a low simmer | ~5,000 BTU |
| Multi-Purpose Burner | Everyday cooking — sautéing, frying, soups, eggs | ~9,100–12,000 BTU |
| High Power Burner | Rapid boiling, searing, high-heat stir-frying | ~15,000–18,000 BTU |
Match your cookware size to the burner as well. The flame should contact the base of your pan without extending up the sides — that keeps heat focused where it belongs and helps prevent handles from overheating.
Step 3 — Ignite the Burner
Automatic ignition (most modern models):
Push in the control knob and turn it to the LITE position. You will hear a series of clicks as the igniter sparks. Only the burner with the knob turned to LITE will produce a flame — it is normal for all burners to click simultaneously on some models. Once the flame catches, turn the knob to your desired heat setting. The clicking will stop.
If the burner does not light within four to five seconds, turn the knob back to OFF. Wait about one minute to allow any unburned gas to clear, then try again. If it still does not light, check that the burner cap is properly seated and clean — a misaligned or dirty burner cap is the most likely cause of ignition issues.
Manual ignition during a power outage:
Many Whirlpool® gas ranges allow surface burners to be manually lit during a power outage, since the gas supply operates independently of electricity. Check your owner's manual first to confirm this is supported on your model. If it is, use a long match or long-reach lighter — never a short match held close to the burner. Hold the flame near the burner head, push in the control knob, turn it to LITE, and the burner should catch within one to two seconds.
Note that while surface burners can often be lit manually, the gas range oven requires electric ignition and will not operate during a power outage.
Step 4 — Read Your Flame
A properly burning gas burner produces a blue flame with a small, crisp inner cone — this tells you the burner is operating correctly.
If you notice a steady yellow or orange flame, the burner cap could be dirty, misaligned, or the burner ports may be clogged. Remove the burner cap, wash it with warm soapy water and a nonabrasive scrubbing pad, clear any debris from the burner ports, and reinstall the cap. Relight the burner and check whether the flame has returned to blue.
Quick Reference:
Blue flame with inner cone → Burner is burning correctly
Steady yellow or orange flame → Burner cap may need cleaning or realignment
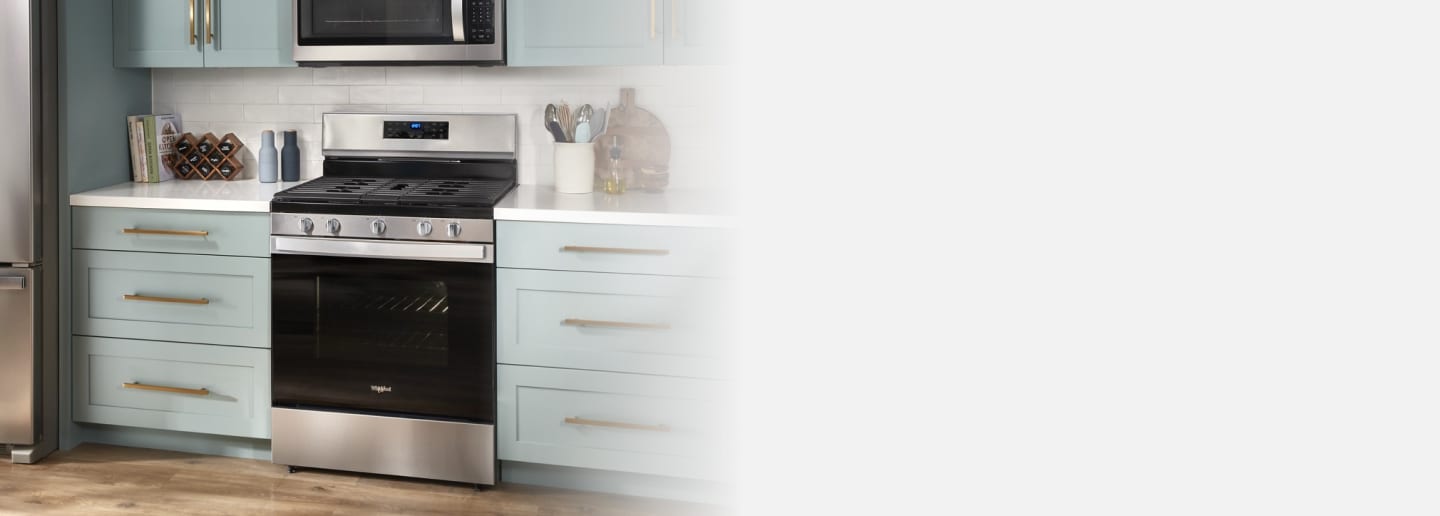
Whirlpool® Gas Ranges
Get dinner on the table with ease
Whether you’re baking a casserole or roasting your family’s favorite chicken recipe, a Whirlpool® Gas Range offers convenient features to help you at mealtime
Step 5 — Place Your Cookware and Set the Flame Height
Center your pot or pan over the burner grate so it sits stably, with the flame contacting the base evenly. The flame should reach up to the base of the pan — if it is climbing the sides of the cookware, dial back the heat. An oversized flame that licks up the sides wastes energy and can make handles uncomfortably hot. Adjusting the flame on a gas stove is one of its real advantages: the response is almost instant.
Note that the exception to this is curved cookware, such as a wok, where flames around the side actually lend to techniques like stir frying.
Step 6 — Monitor Your Cook
Gas delivers heat differently than an electric coil — the flame acts directly on your cookware and responds immediately to every adjustment. Keep an eye on your cook, especially at high heat. Boil-overs happen quickly, and a foaming pot can travel from "almost boiling" to "over the edge" in moments. Because gas turns off completely the instant you move the knob to OFF — with no stored heat to slowly dissipate — reducing or extinguishing the flame immediately stops the heat. That responsiveness is one of the reasons so many home cooks love cooking on gas.
Step 7 — Turn Off the Burner
When you are done cooking, turn the control knob to the OFF position and visually confirm that the flame is completely out. Once the burner and grates have cooled, clean up any spills on the burner cap promptly — food and grease left on or around the burner cap can block the ports and make ignition less reliable next time.
Select Whirlpool® gas ranges and cooktops feature EZ-2-Lift™ Hinged Cast-Iron Grates, which let you swivel grates up for quick spill access and slide cookware smoothly across the continuous grate surface. For a full walkthrough on keeping burners and grates clean, visit the Whirlpool® guide on how to clean stove burners and grates.
Explore Whirlpool® Gas Cooktops

How to Use a Gas Range Oven
A gas range oven is a natural partner to the cooktop above it — and once you understand how it works, you will find it just as intuitive to use. Gas range ovens use a burner at the bottom of the oven cavity combined with electric ignition to produce heat. Because the oven relies on electric ignition, it will not operate during a power outage — though surface burners can often still be manually lit on supported models. Learn more about the parts of an oven for a closer look at how they work.
One characteristic worth knowing: gas ovens naturally produce a small amount of ambient moisture as the gas burns, which means they tend to create a slightly more moist environment compared to a dry electric oven.
Setting and Preheating a Gas Oven
Turn the oven temperature knob to your desired setting, then allow the oven to preheat completely before placing food inside. For most ovens, preheating takes about 10–15 minutes, though this varies by model — check your owner's manual for the timing that applies to yours. Many Whirlpool® gas ranges feature a preheat indicator light or audio alert that signals when the oven has reached temperature. Select models also offer Rapid Preheat to get there faster, and Frozen Bake™ Technology that lets you skip preheating altogether for frozen favorites like pizza, lasagna, and chicken nuggets.
Gas Oven Heat Settings Explained
| Setting | Approximate Temp | Best For |
|---|---|---|
| Warm | 170°F | Keeping cooked food warm until serving |
| Low | 250°F | Slow cooking, braising, drying |
| Moderate | 325–350°F | Baking cakes, cookies, and casseroles |
| High | 400–425°F | Roasting vegetables, baking bread and pizza |
| Very High | 450–500°F | High-heat roasting, finishing |
| Broil | High radiant heat from top burner | Browning, charring, melting cheese, finishing |
Tips for Even Baking in a Gas Oven
Because gas ovens can develop slight heat variation between the bottom and upper racks — the bottom burner is the heat source — rotating your baking pans halfway through cook time can help promote more even results. It is a small habit that makes a real difference, especially for cookies, sheet cakes, and anything baked on a half-sheet pan.
Select Whirlpool® ranges and ovens feature Air Cooking Technology for dynamic airflow and the intense heat of Air Fry and Air Baking. Our high-speed fan on these models optimizes air flow and drives consistent heat throughout the oven to help you get even results across multiple racks.
Explore Whirlpool® Gas Ranges

Gas Stove Cooking Techniques
One of the most rewarding things about cooking on a gas stove is how quickly the feedback loop becomes second nature. You can see the flame, feel the immediate response when you adjust the knob, and develop an intuitive sense of heat levels. Here is a guide to the core stovetop techniques a gas range handles beautifully.

Boiling
Use the largest, highest-BTU burner and set it to high to bring water or broth to a rolling boil quickly. On select Whirlpool® models, the SpeedHeat™ Burner boils 20% faster than a standard 9,500 BTU burner on the same range — a meaningful difference on a busy weeknight. Once food goes in, reduce to medium to keep an active simmer without foam rolling over the edge.

Simmering
Simmering is where patience pays off. The goal is a gentle, steady heat — small bubbles occasionally breaking the surface, not a vigorous boil. The dedicated low-BTU burner is your best tool here: on Whirlpool® ranges and cooktops, the 5,000 BTU Simmer Burner is designed precisely for the low-level heat that sauces, soups, and braises need. If your simmer begins to boil, reduce the flame gradually until you’re back at a gentle simmer.

Sautéing and Stir-Frying
Gas stoves shine for sautéing and stir-frying because of how quickly you can adjust the heat. For sautéing, preheat your pan over medium-high heat for one to two minutes before adding any oil — you will know it is ready when a small drop of water flicked into it evaporates on contact. Add your oil and let it shimmer before adding food. Keep ingredients moving in the pan, and do not overcrowd it; too many items at once lowers the pan temperature and results in steaming rather than browning.
For stir-frying, use the highest-BTU burner at high heat and keep the pan in near-constant motion. Cook in small batches so the pan stays hot throughout. A wok or carbon steel pan is ideal for stir-frying on gas because both heat quickly and respond almost immediately to flame changes.

Searing
High BTU output is ideal for the deeply browned crust that makes seared proteins so satisfying. The SpeedHeat™ Burner on select Whirlpool® gas ranges delivers the sustained high heat a proper sear demands. Use a heavy-bottomed cast iron or stainless steel pan, preheat it dry for two minutes, then add a thin layer of high-smoke-point oil (avocado, canola, or refined vegetable). Add your protein once the oil shimmers, then resist the urge to move it — let the crust develop undisturbed for two to three minutes. A properly seared piece will release naturally from the pan when it is ready to turn. Finish thicker cuts in the oven to cook through without losing the crust.

Slow Cooking and Braising on the Stovetop
Long, slow stovetop braises are forgiving and rewarding — and a gas stove handles them well. Use a heavy Dutch oven or enameled cast iron pot for even heat retention. Bring the liquid to a simmer on medium, then reduce to the lowest flame on your simmer burner. You are looking for the occasional lazy bubble barely disturbing the surface. A gas burner is ideal for quickly adjusting heat that is too high since there is no residual heat from the burner like with an electric coil.

Using a Griddle on Your Gas Stove
A stovetop griddle opens up a whole new range of family-friendly meals — from Saturday morning pancakes to quick weekday quesadillas. Preheating the griddle is the most important step — a cold griddle causes food to stick and cook unevenly, while a properly preheated one releases food cleanly and helps produce even browning
Select Whirlpool® gas ranges feature a Griddle Zone burner that offers nearly 3x more griddle space2 than an 8" skillet and more power than the leading range. Easily cook and flip a variety of foods like pancakes, meats, and veggies.

Choosing the Right Cookware for Your Gas Stove
Gas stoves work with virtually every type of cookware, but some materials perform better over an open flame than others. The qualities that matter most are a flat bottom for stable, even contact with the grate, good heat conductivity, and enough weight to sit securely without tipping.
| Cookware Material | Works on Gas? | Notes |
|---|---|---|
| Cast iron (skillet, Dutch oven) | Excellent | Retains heat exceptionally well; slow to heat but holds temperature steadily once hot; works at all flame levels |
| Stainless steel | Excellent | Durable, non-reactive, and easy to clean; pairs well with high-heat techniques like searing and sautéing |
| Carbon steel (wok, skillet) | Excellent | Heats quickly and responds to flame changes quickly; go-to for stir-frying and high-heat wok cooking |
| Enameled cast iron | Very good | The heat-retention benefits of cast iron with an easy-clean surface; avoid thermal shock |
| Hard-anodized aluminum | Good | Lightweight and quick to heat; performs well at medium and medium-high flame |
| Copper | Good | Responds to flame changes fast; excellent for sauces requiring precision temperature control |
| Non-stick (PTFE/ceramic) | Use with care | Suitable for low-to-medium heat tasks like eggs and pancakes; flame should not extend beyond the base of the pan |
| Glass or ceramic | Not recommended | Not designed for open-flame stovetop use; suitable for oven use only |

Gas Stove Care: Cleaning and Maintenance Tips
A clean gas stove can mean a better-performing gas stove. Regular cleaning helps prevent clogged burner ports, supports consistent ignition, and helps keep your kitchen looking its best. The most effective habit is the simplest: wipe down the cooktop and burner caps after every use once the cooktop has cooled. Acidic spills — like tomato sauce or vinegar-based dishes — should be cleaned as soon as the surface cools, since they can affect the finish if left to sit.
Learning how to clean stovetops from grates, to burners to the cooktop surface can help you keep your stove operating optimally. For the inside of your gas oven, including racks and the oven floor, see our full guide on how to clean an oven.


Gas Stove FAQs
A yellow or orange flame typically means the burner cap is dirty, misaligned, or the burner ports are clogged. A properly burning burner produces a blue flame with a small, crisp inner cone. Remove the burner cap, wash it with warm, soapy water and a nonabrasive scrubbing pad, use a straight pin or needle to clear any clogged ports in the burner base, and reinstall the cap with the alignment pins properly seated. Relight the burner and check whether the flame has returned to blue. If it stays yellow or orange after cleaning and realignment, contact a Whirlpool authorized service technician.
Some gas ranges allow the surface burners to be manually lit during a power outage, since the gas supply does not depend on electricity. Without power, the electronic igniter will not spark — but you can use a long match or long-reach lighter to light the burner manually on supported models. Always check your owner's manual first to confirm whether your model supports manual surface-burner ignition. The gas range oven, however, requires electric ignition and will not operate during a power outage.
The single most effective cleaning habit is the simplest one: wipe down the burner caps after every use, once the cooktop has cooled. Beyond that routine wipe-down, plan for a deeper clean of the grates, burner caps, and burner ports at least once a week with regular cooking use. Acidic spills like tomato sauce or anything vinegar-based should be cleaned as soon as the cooktop cools, since those can affect the surface finish if they sit.
There are a few real differences between gas and electric ovens worth knowing about. Gas ovens produce a small amount of ambient moisture during baking, which tends to result in softer, chewier textures compared to the drier heat of a conventional electric oven. Gas ovens can also develop slight heat variation between racks — the bottom-mounted burner makes the lower zone slightly hotter. Rotating your pans halfway through baking is a simple and effective way to compensate. If your gas range features True Convection or Air Cooking Technology, that mode circulates heated air throughout the oven for even, consistent results across multiple racks.
Yes — cast iron is one of the best-performing cookware choices for a gas stove. Its heat retention makes it exceptional for searing, frying, and long stovetop braises. It heats slowly compared to stainless or carbon steel, so allow extra preheat time — but once hot, it holds temperature steadily even when cold ingredients go in. Make sure your pan has a flat bottom so it sits securely on the grate. On ranges with continuous cast-iron grates, a heavy skillet slides easily between burners when you need to reposition it.
1. Compared to 9.5K burner on the same model.
2. Compared to the leading brand’s best selling model. Based on reported BTU output. Griddle not included.
This article includes AI-generated content that our human team has reviewed and edited to ensure quality
Was this article helpful? Pass it on
Explore more with Whirlpool brand