

 New Code Sent!

30- vs. 36-inch cooktops: Key differences & benefits
Renovating your cooktop space can transform the way you prepare family meals. Keep reading to discover the key differences between 30-inch vs. 36-inch cooktops, learn what factors to consider when making your choice, and determine which option best suits your cooking style and kitchen layout. Plus, learn the steps to swapping out a 30-inch cooktop for a 36-inch model.

Sign Up for More Insights to Stay Connected
Enjoy articles like this? Get helpful guides and appliance care tips sent straight to your inbox.

Your subscription was successful
Thank you for signing up. Keep an eye on your inbox for our next newsletter.

Key differences between 30-inch and 36-inch cooktops
Cooktop width may be the most obvious difference when comparing 30-inch and 36-inch cooktops, but the differences don’t stop there. Find out below how differing cooktop dimensions can sometimes impact burner spacing, cookware clearance, ventilation coverage and cutout requirements.
Cooktop width: As you may expect, 36-inch cooktops provide an additional six inches of width compared to their 30-inch counterparts, offering more room to work with on the cooking surface. These larger cooktops can accommodate larger pans more comfortably than a 30-inch cooktop and help make the cooktop feel less crowded when multiple burners are used simultaneously.
Ventilation requirements: Your range hood dimensions should be at least as wide as your cooktop for optimal ventilation, so 36-inch cooktops require a larger hood to ensure proper coverage. Upgrading to a larger hood may also impact your existing cabinet structure.
Available burners: Both cooktop sizes can come with a fifth burner, but the larger surface area of a 36-inch cooktop offers a more spaced out option.
Installation requirements: Cooktops fit into countertop cutouts, which need to be slightly smaller than the cooktop itself so the cooktop surface can extend beyond the cutout and onto the countertop. Generally, this means that larger cooktops require bigger cutouts for installation. You may have to remove current counter space to accommodate a larger cooktop.
30-inch vs. 36-inch cooktop comparison chart
| Width | Common burner capacity | Countertop cutout and cabinet considerations | Range hood size | Ideal-fit kitchen layouts | Cooking routines | Typical cost * |
|---|---|---|---|---|---|---|
30-inch | Four or five burners | More countertop space to prep | Minimum 30 inches | Smaller spaces | Average, one-pot dishes | $300- $1,000+ |
36-inch | Five or six burners | Less countertop and cabinet space in exchange for a larger cooktop | Minimum 36 inches | Larger kitchens | Complex, multi-pot dishes | $500- $2,000+ |
*Typical costs reflect a general, ballpark average. Some models do vary.


What to consider when deciding between a 30-inch and 36-inch cooktop
Choosing between a 30-inch vs. 36-inch cooktop ultimately comes down to your personal taste, kitchen’s layout, daily cooking habits, desired cooktop fuel type, ventilation requirements and budget. Understanding the size options available for gas cooktops can significantly impact your kitchen design and cooking experience, enhancing functionality and style. Explore five key considerations below to help guide your search.
Kitchen layout: Unless you plan to remodel, the size of your current cabinet cutout may dictate whether you opt for a 30-inch or 36-inch cooktop. Smaller cooktops are ideal for compact kitchens that may not have much countertop space for food prep, while 36-inch models may be ideal for larger kitchens with room to spare. It’s recommended to reserve at least 8 inches of counter space on either side of the cooktop to accommodate food prep.
Cooking routines: Using a 36-inch cooktop to make meals for a larger family can give you more room to make multiple dishes or large batches at once. If you typically prepare smaller portions or simple meals, a 30-inch cooktop may be all you need to get the job done. Some 30-inch cooktops come equipped with a fifth burner, but you may find less room to navigate large cookware.
- Cooktop type: Installation and ventilation needs can differ depending on the fuel type you choose. For instance, gas cooktops may require a slightly larger cutout compared to electric or induction models.
- Range hood size: Your range hood should match the width of your cooktop to properly capture the smoke, grease and odors that rise while cooking. While 30-inch range hoods are the most common range hood size, 36-inch options like these Whirlpool® models are available to help provide effective ventilation for larger cooktops.
- Budget: 36-inch cooktops can be slightly more expensive than their 30-inch counterparts. It's also worth considering any renovations your space may need and the possibility that you may require a new range hood. Balancing all these factors can help you decide which size is right for your kitchen—and your budget.
- Energy use: Energy use and long-term cost depends on the fuel type of the cooktop, as well as burner use, cookware fit and cooking habits. Induction cooktops can be up to three times more efficient than gas cooktops and up to 10% more efficient than conventional, smooth-top electric cooktops.

Why choose a 30-inch cooktop?
A 30-inch cooktop may be the ideal fit for smaller kitchens, offering many of the same features as its larger 36-inch counterpart. These cooktops can fit easily into many standard kitchen layouts. While many 30-inch cooktops come with four burners, five burner 30-inch cooktops are becoming more popular as well. This can give you more burner space in a smaller footprint.
It’s also helpful to have a 30-inch cooktop if you want to preserve your prep space or your existing cabinet structure, as a 36-inch cooktop can possibly eat up space in both of these areas.
For households that don’t regularly prepare large or elaborate meals, a 30-inch cooktop often provides ample cooking space at a lower price point than a 36-inch model.

Need help choosing a new cooktop?
Shop Whirlpool® 30-Inch Cooktops
Whirlpool® 30-Inch Cooktops accommodate smaller spaces without sacrificing on performance. Temp Cook™ Induction Technology on select models helps you avoid burning with dual temperature sensors that monitor and maintain your heat.

Why choose a 36-inch cooktop?
A 36-inch cooktop offers extra space and sometimes five or six burners, rather than four. It’s a great choice for larger kitchens, especially if you often prepare big family meals or host gatherings. A 36-inch cooktop can add flexibility to juggle multiple dishes and sides with less hassle.
Along with possibly getting more burners, you may get more space between the burners as well, giving you more room for large pots and pans. Some 36-inch cooktops also have larger elements or speciality features like flexible bridge zones for griddles.
If you’re upgrading from a 30-inch cooktop to a 36-inch cooktop, you may have to give up counter and cabinet space to accommodate the larger opening. There may also be electrical upgrades to consider. You may want to consult with a contractor to determine what upgrades you may need.
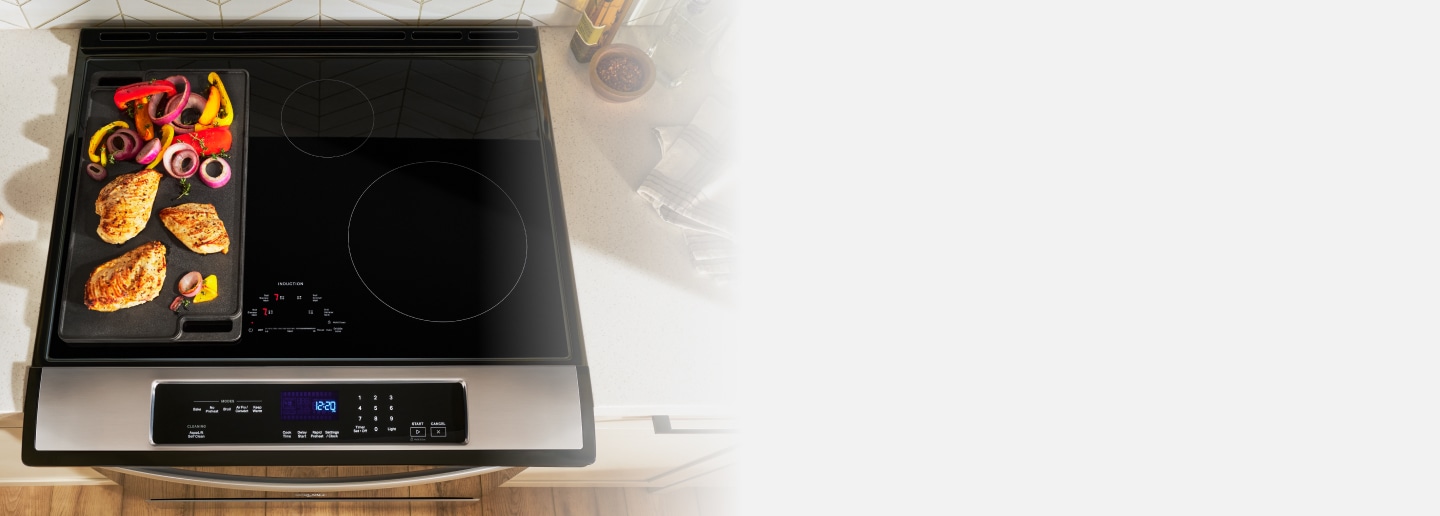
Whirlpool® Induction Cooktops
Get responsive temperature control
Induction Cooktops from Whirlpool brand offer fast cooking and responsive temperatures, paired with a sleek, easy-to-clean surface
Shop Whirlpool® 36-Inch Cooktops
Available in gas and electric models, Whirlpool® 36-Inch Cooktops give you the room you need to make more for the people you love. The FlexHeat™ Triple Radiant Element on select models is like having three elements in one.

How to replace a 30-inch cooktop with a 36-inch cooktop
Upgrading to a 36-inch cooktop may be achievable in any kitchen with enough space, but be aware that some renovations to your cabinetry, cutout size and ventilation setup may be necessary beforehand. Walk through a step-by-step overview for installing a new cooktop below, or find a more detailed explanation of the process with this guide.

Step 1: Measure cabinetry
If you want to replace your cooktop with a larger model, start by making sure your cabinets can accommodate the extra width. If the cabinet holding your old cooktop is 32 inches wide or smaller, you may need to plan to remove some cabinets to make room.

Step 2: Plan for ventilation
Before replacing your cooktop, measure the width of your range hood or over-the-range microwave to ensure it’s at least 36 inches wide. Plan for a replacement if necessary.
Begin by measuring the width of your cooking surface, then measure the width of the existing hood. The hood should, at minimum, be as wide as the cooking surface. However, you can also opt for a hood that is six inches wider than your cooktop.
Then, measure the height of the space between the cooking surface and the bottom of the hood, leaving 20-36 inches of space for an electric cooktop and 24-36 inches of space for a gas cooktop.
Finally, measure the depth of the cooking surface, going from the front to back of the cooking surface and excluding the control panel and trim. The vent hood should be deep enough to provide adequate coverage for the front and rear burners.

Step 3: Disconnect the fuel source
Always disconnect the fuel source before removal. If you’re reconnecting a cooktop with the same type of fuel source, label or photograph the wiring for an easier reconnection. You may want to hire a professional if you do not feel comfortable doing this step yourself or if you need any kind of electrical upgrade for the larger cooktop.

Step 4: Turn off the power
Turn off the electricity at the fuse box and confirm it's off with a circuit tester before you handle the cooktop.

Step 5: Remove old cooktop
Make sure you have enough space to work by removing any surrounding cabinet doors or drawers, detach all removable parts from the cooktop, unscrew any brackets holding it in place and then, with help, lift the cooktop out.
Step 6: Measure countertop opening
With the cooktop removed, it’s time to measure the empty countertop cutout. Cooktops generally need 36 inches of space as well as 1-2 feet of clearance on each side, but requirements can vary by model, so check your new product manual for details. Be sure to measure your space, allowing for ½ inch to 1 inch on each side for the overhanging lip, and make sure there’s plenty of space below for the burners.

Step 7: Prepare the opening
If your cutout is not big enough to support the new width of your cooktop, you’ll want to consult a contractor to help expand your cutout.

Step 8: Prepare new cooktop
Remove your new cooktop from its packaging and remove protective materials. Set aside loose parts until you’re finished installing the cooktop.

Step 9: Install clips and brackets
Clips attach to your cooktop and snap into brackets that hold it securely in place on the countertop cutout. These brackets can be secured with screws or adhesive. For specific installation instructions, check your product manual.

Step 10: Lower cooktop into opening
With help, lower the cooktop into place and align the clips with the countertop brackets, then push down to secure them.

Step 11: Connect fuel source
This step differs depending on whether you're connecting a gas or electric cooktop, so be sure to follow your product manual for specific instructions. If you're uncomfortable with this step or unsure how to do it, bring in professional help.

Step 12: Install trim
Tighten the screws on the clips and brackets for a secure hold, and if you're adding trim, don’t forget to caulk the area. Follow your product manual to attach accessories such as the knobs, burner covers and grates.

30-inch vs. 36-inch cooktop FAQs
Get answers to frequently asked questions about 30-inch vs. 36-inch cooktops
Do 36-inch cooktops improve cooking performance?
A 36-inch cooktop can provide more cooking space, which can be helpful if you’re cooking multiple dishes at once. These cooktops will generally come with five or six burners and can be helpful for complex, multi-pot dishes.
What cooktop size is better for everyday cooking?
What cooktop size is best for everyday cooking depends on your kitchen layout, family size and cooking habits. Use a 30-inch cooktop if you have less kitchen space and plan on cooking simple or average meals. 36-inch cooktops can be helpful in bigger kitchens, especially when cooking complex meals or multiple dishes at once.
Shop Whirlpool® Gas, Electric and Induction Cooktops
Whirlpool® Cooktops have the features you need to move through dinner prep and cleanup without a hitch. On select Whirlpool® Gas Cooktops, the FlexHeat™ Burner uses two rows of flames to give you the evenly distributed high heat you need for rapid boiling and searing or the lower temperatures necessary for more delicate dishes. And with induction technology on some Whirlpool® Cooktops, you can clean up quickly as the cooktop surrounding the elements stays cool, helping prevent baked-on messes.

Whirlpool® WipeClean™ Coating
Simplify after-dinner cleanup
This Whirlpool® Induction Cooktop with the WipeClean™ Coating lets you skip scraping and intense scrubbing of baked-on foods
Was this article helpful? Pass it on
Explore more with Whirlpool brand