New Code Sent!

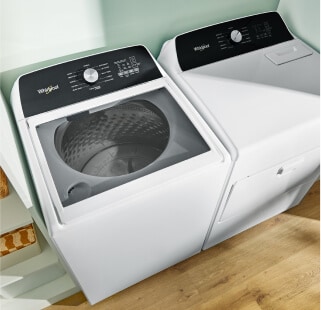
How to level a washer: a step-by-step guide
A level washing machine is helpful for optimal operation, quiet cycles and the overall longevity of your appliance. Whether you’re installing a new washer or troubleshooting excessive vibrations, understanding how to level your machine can help save time and may prevent unnecessary wear and tear. This guide will walk you through step-by-step instructions for leveling top and front load washers, as well as stackable washer and dryer sets, and washers on pedestals.


Your subscription was successful
Thank you for signing up. Keep an eye on your inbox for our next newsletter.
Sign Up for More Insights to Stay Connected
Enjoy articles like this? Get helpful guides and appliance care tips sent straight to your inbox.


Do you always have to level a washing machine?
It’s always important to make sure your washer is level when you first install it and to check that it has stayed level over time. An unlevel washing machine can lead to several issues that may impact your laundry routine and the appliance itself. These include:
Excessive vibration: Shaking during cycles can be noisy and disruptive.
Damage to components: Prolonged imbalance can strain internal parts, leading to needed repairs.
Inefficient performance: An unlevel washing machine may not spin or drain properly, leaving clothes wetter than desired.
Floor damage: Vibrations can possibly cause scratches or dents in flooring.
By taking a few simple steps to level your washer, you’ll help ensure it operates smoothly and efficiently. If you're installing a new appliance, check out this guide on how to install a washing machine for additional tips.
How to level a top load washing machine
If you’re wondering how to level a top loading washing machine, the following steps can be used. However, always check your washer’s user manual first, to be sure of any specific instructions regarding your model.
Tools needed:
Adjustable wrench or pliers
Bubble level
Gloves (optional)
Wood block or shim
WARNING: Excessive Weight Hazard
Use two or more people to move and install your washer. Failure to do so can result in back or other injury.
Step 1: Position the washer
Place the washer in its final location on a solid, flat surface. Make sure it’s not pushed against walls or other appliances.
Step 2: Check for levelness
Use a level to check your washer from side-to-side and front-to-back. Also, press down on opposite corners of the washer. If it rocks diagonally, adjustments may be needed.
Step 3: Adjust the front legs
If the washer needs to be leveled, have someone help you gently lift the front of the washer and brace it with a wood block or shim. Use an adjustable wrench or pliers to turn the legs clockwise or counterclockwise to adjust their height.
Step 4: Adjust the rear legs
For self-leveling rear legs, tip the washer forward slightly and set it back down. The legs should automatically adjust. If manual adjustment is required, follow the same process as for the front legs.
Step 5: Secure the adjustments
Tighten the lock nuts on all legs to prevent them from shifting over time.
Step 6: Double check
Gently rock the washer again and recheck with a level. Repeat adjustments if necessary.

Find the best washer for you
What size washer do you need?
Shop Whirlpool® Top Load Washing Machines
Whirlpool® Top Load Washers are designed with a variety of features on select models like multiple cycles, Pretreat Stations and removable agitators to handle all of your family’s laundry needs. With thoughtful design and convenient features, these washers make laundry day easier for busy families.


How to level a front load washing machine
If you’re wondering how to level a front load washing machine, try the following steps. First, be sure to check your user manual to find specific directions for your washing machine.
Tools needed:
Adjustable wrench or pliers
Bubble level
Gloves (optional)
Wood block or shim
WARNING: Excessive Weight Hazard
Use two or more people to move and install your washer. Failure to do so can result in back or other injury.
Step 1: Position the washer
Place the washer in its final location on a firm surface.
Step 2: Check for levelness
Place a level on your washer and check levelness from front-to-back and side-to-side. Push on opposite corners of the washer diagonally. If it rocks, adjustments may be needed.
Step 3: Adjust leveling feet
If your washer needs leveling, have someone help you lift the front of the washer and brace it with a shim or wood block. Loosen the lock nuts on the feet using an adjustable wrench or pliers. Adjust the feet as needed, turning the feet clockwise or counterclockwise until the washer is level side-to-side and front-to-back.
Step 4: Secure the adjustments
Tighten the lock nuts on all legs to prevent them from shifting over time.
Step 5: Double check
Place a bubble level on top of the washer and confirm it is level in all directions.
Shop Whirlpool® Front Load Washing Machines
Front Load Washers from Whirlpool® are built with helpful features like the Load & Go™ Dispenser, available on select models, which automatically senses your laundry load size and adds the right amount of detergent. These machines are great for families looking for convenient options without compromising performance.


How to level a washer on a pedestal
Laundry pedestals are platforms designed to raise some washers and dryers off the floor, making it easier to load and unload laundry while providing additional storage space. Always be sure to check if your washer is compatible with a pedestal. Then, follow your user care manual for specific instructions on attaching your pedestal to your washer and leveling it.
Tools needed:
Adjustable wrench or pliers
Bubble level
Gloves (optional)
Wood block or shim
WARNING: Excessive Weight Hazard
Use two or more people to move and install your washer. Failure to do so can result in back or other injury.
Step 1: Attach your Pedestal
Use your user care manual and follow the manufacturer instructions for attaching your pedestal to your washing machine. Then, with the help of another person, move your machine into place.
Step 2: Check the levelness
Place a level on your machine from front-to-back and side-to-side to check for levelness.
Step 3: Level
If your washer needs leveling, get help to gently lift the front of your washer and pedestal and prop it up, using a wood block or shim. Then, adjust the pedestal’s feet using a wrench or pliers. Locate the lock nuts on each leg and loosen them using an adjustable wrench or pliers. Turn the legs clockwise or counterclockwise to raise or lower the washer. Do the same process on the back, if needed, and adjust each leg until the washer is level in all directions. Tighten the lock nuts to help keep the machine level and secure.
Step 4: Double check
Use a level to double check for accuracy. Make adjustments as needed.
Shop Whirlpool® Laundry Pedestals
Whirlpool® Laundry Pedestals raise your washer and dryer to a comfortable height for loading and unloading. They also provide you with a convenient area to store laundry essentials.


How to level a stackable washer and dryer
Some washers and dryers are designed to be stacked on top of each other. Stacking washers and dryers can save valuable space in smaller laundry areas but leveling them requires care, especially as one unit sits on top of the other. Always check your product manual for specific instructions for your model.
Tools needed:
Adjustable wrench or pliers
Bubble level
Gloves (optional)
Wood block or shim
WARNING: Excessive Weight Hazard
Use two or more people to move and install your washer. Failure to do so can result in back or other injury.
Step 1: Position the washer
For a stackable washer and dryer, the washer always goes on bottom. Move the washer into its final location on a flat surface.
Step 2: Check levelness
Place a bubble level on top of the washer and check side-to-side and front-to-back alignment. Use your hand to try and gently rock the washer. If it rocks, it is likely not level.
Step 3: Adjust leveling feet
When leveling a washing machine, get someone’s help to gently lift the washer a few inches and then use a wood block or shim to help prop up the washer. Then use an adjustable wrench or pliers to turn each foot clockwise or counterclockwise until all feet make even contact with the floor.
Step 4: Secure adjustments
Tighten the lock nuts against each foot once adjustments are complete.
Step 5: Final check
Use a level to double check for accuracy. Make adjustments as needed.
Step 6: Stack units
Using the instructions in your user’s manual, a washer and dryer stacking kit, and the help of another person, stack your dryer on top of your washer as instructed by the manufacturer’s instructions.
Step 7: Double check
Using a level, double check the levelness of the stacked units. Make adjustments as needed.

Washers with Load & Go™ XL Dispenser
Add detergent once and skip refills for 40 loads
Shop Whirlpool® Stackable Washers and Dryers
Whirlpool® stackable laundry units combine space-saving design with powerful cleaning performance. These front load units stack on top of each other, which can be ideal for smaller laundry rooms or homes where maximizing space is essential.
Tips for maintaining a level washing machine
To help keep your washing machine operating at its peak, follow these tips:
Place it on sturdy, even flooring
Avoid overloading your washer; this can cause imbalance during cycles.
Regularly check that lock nuts remain tight on adjustable feet.
FAQs about leveling a washing machine
How do you know if you have an unlevel washing machine?
Signs of an unlevel washing machine might include excessive vibration or rocking during cycles or loud noises.
Can I use my phone as a leveling tool?
You might be able to use your phone to level your washing machine, as many leveling apps effectively mimic bubble levels.
Why does my washer keep going out of balance?
This may be due to uneven flooring or loose lock nuts. A level washing machine helps ensure quieter operation, peak performance and longer appliance life—helping you focus less on laundry problems and more on what matters most: spending quality time with your family.


Helping kids stay in school
Learn how Whirlpool helps end the dropout cycle by giving kids access to clean clothes through the Care Counts™ Laundry Program
This article includes AI-generated content that our human team has reviewed and edited to ensure quality.
Was this article helpful? Pass it on
Explore more with Whirlpool brand